Kategorie: Uncategorized

  • Tumblr Profil mit Social Poster verbinden

    Wie verbinde ich mein Tumblr-Profil mit Social Poster?

    Einführung

    Tumblr ist eine Blogging- und Social-Media-Plattform, die es Nutzern ermöglicht, kreative Inhalte in Form von Bildern, Texten, GIFs und Links zu teilen. Unternehmen, Künstler und Blogger nutzen Tumblr, um ihre Marke zu präsentieren und mit einer kreativen Community in Kontakt zu treten. Durch die Integration von Tumblr mit Social Poster kannst du Inhalte effizient vorausplanen und automatisiert veröffentlichen.


    1. Vorteile der Verbindung mit Social Poster:

    ✔ Automatisches Posten von Inhalten auf deinem Tumblr-Blog
    ✔ Vorausplanung von Beiträgen für eine konsistente Content-Strategie
    ✔ Einheitliche Verwaltung deiner Social-Media-Kanäle
    ✔ Zeitersparnis durch Automatisierung


    2. Voraussetzungen

    Bevor du dein Tumblr-Konto mit Social Poster verbinden kannst, stelle sicher, dass folgende Anforderungen erfüllt sind:

    Du benötigst ein aktives Tumblr-Konto mit einem Blog.
    Die Berechtigungen für Tumblr müssen über die API autorisiert werden.
    Das Tumblr-Konto muss Social Poster Zugriff auf das Veröffentlichen von Beiträgen gewähren.

    Hinweis: Tumblr erlaubt Drittanbieter-Tools nur das Posten von regulären Bild- oder Textbeiträgen. Funktionen wie Karussell-Posts oder Videos können nicht automatisiert veröffentlicht werden.


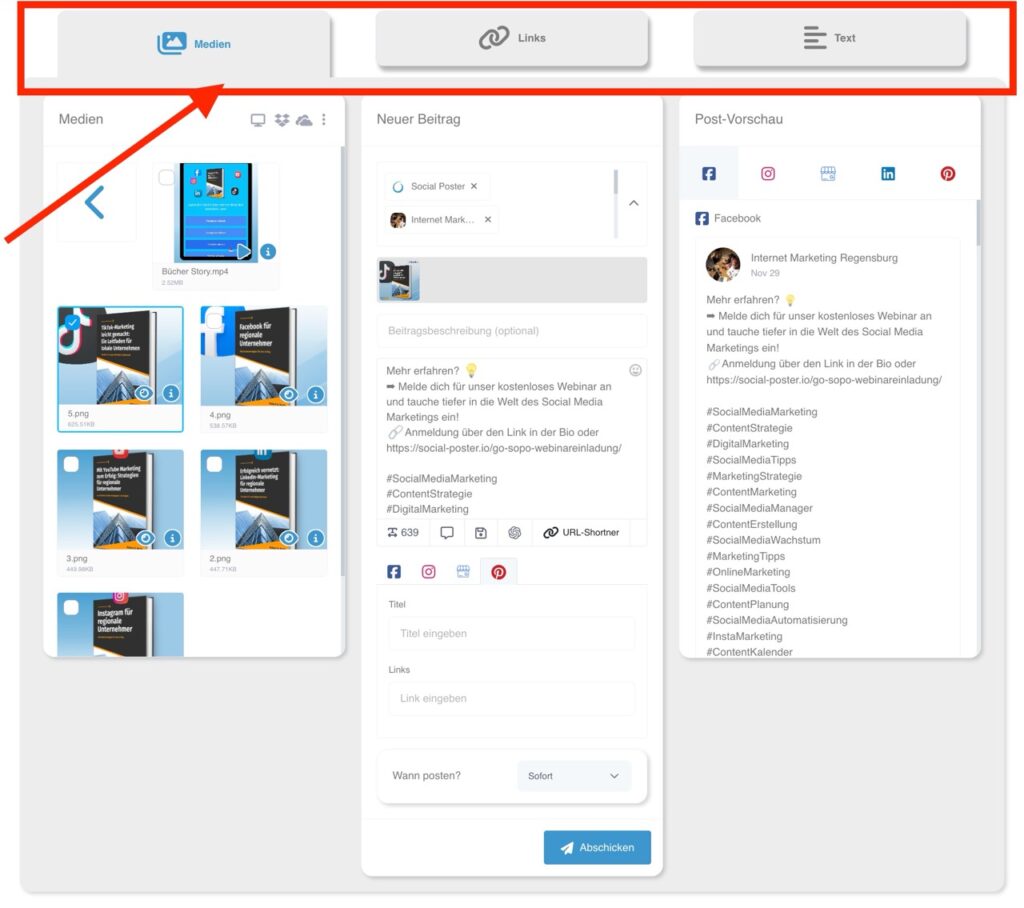
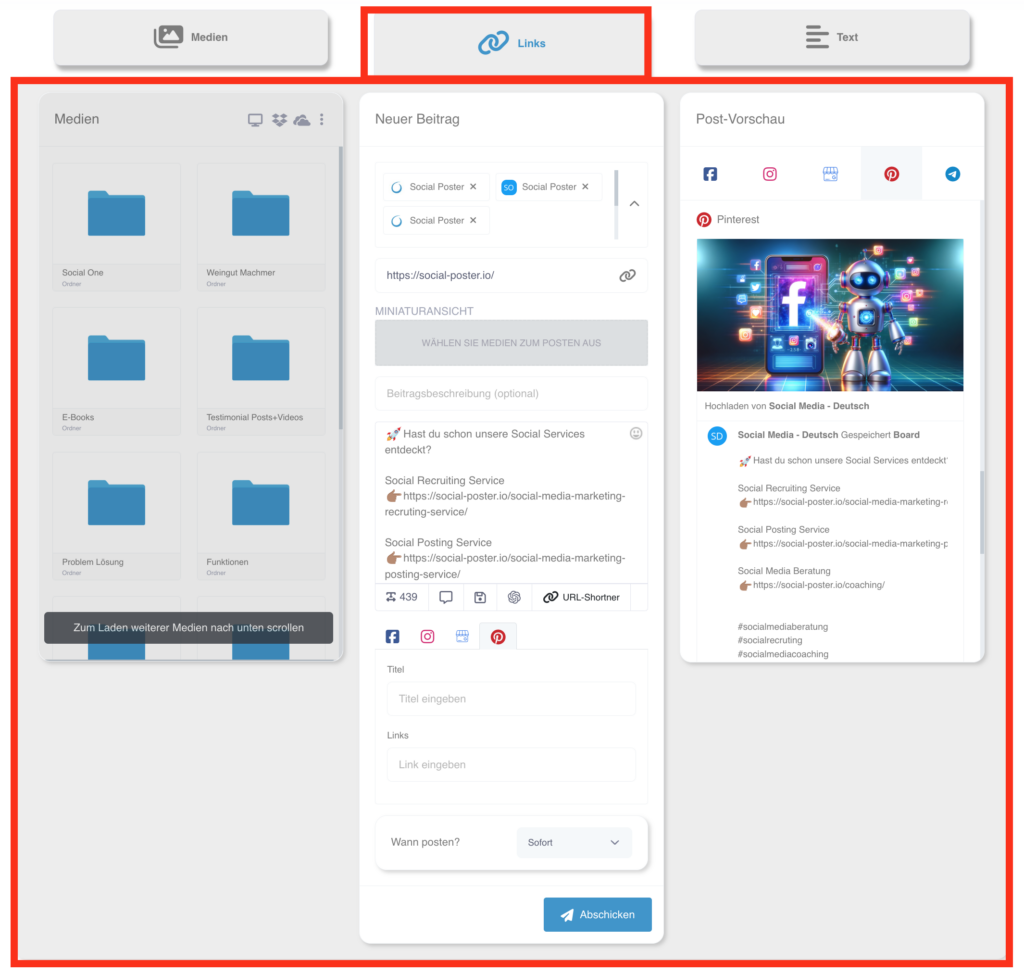
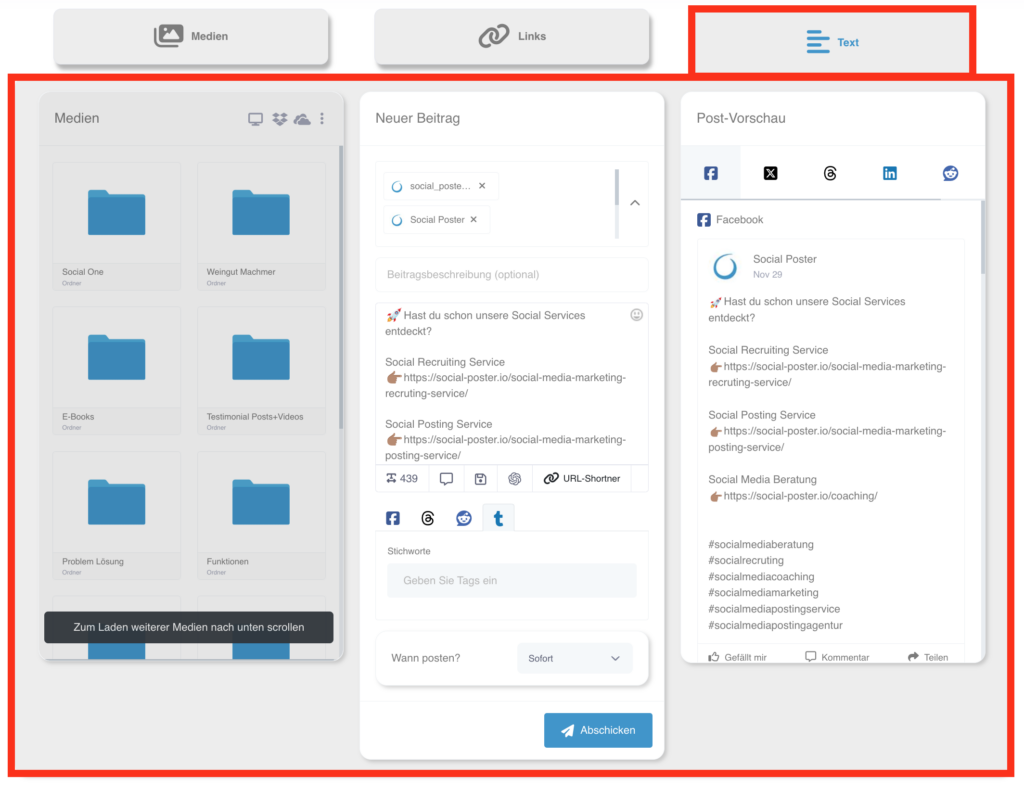
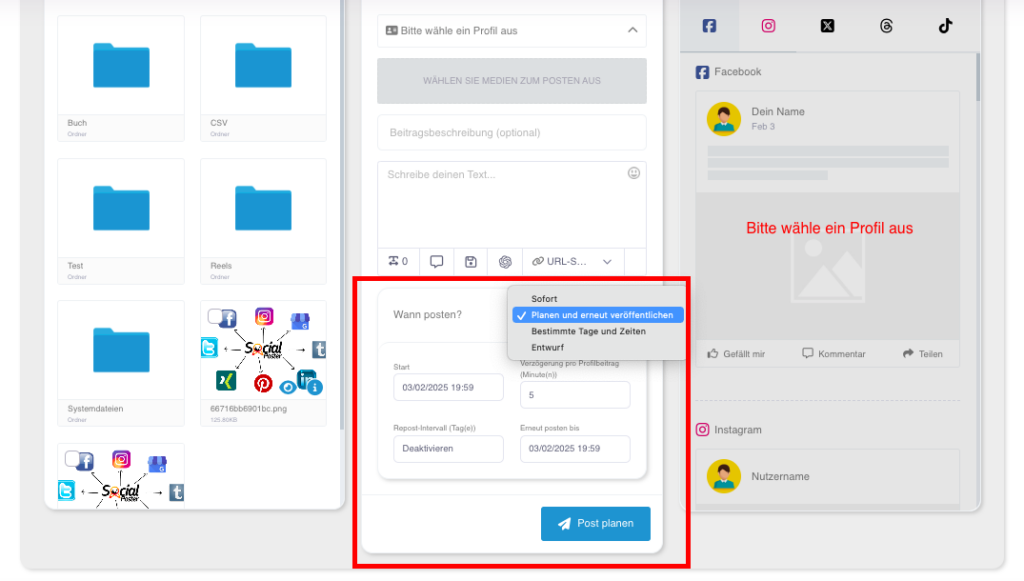
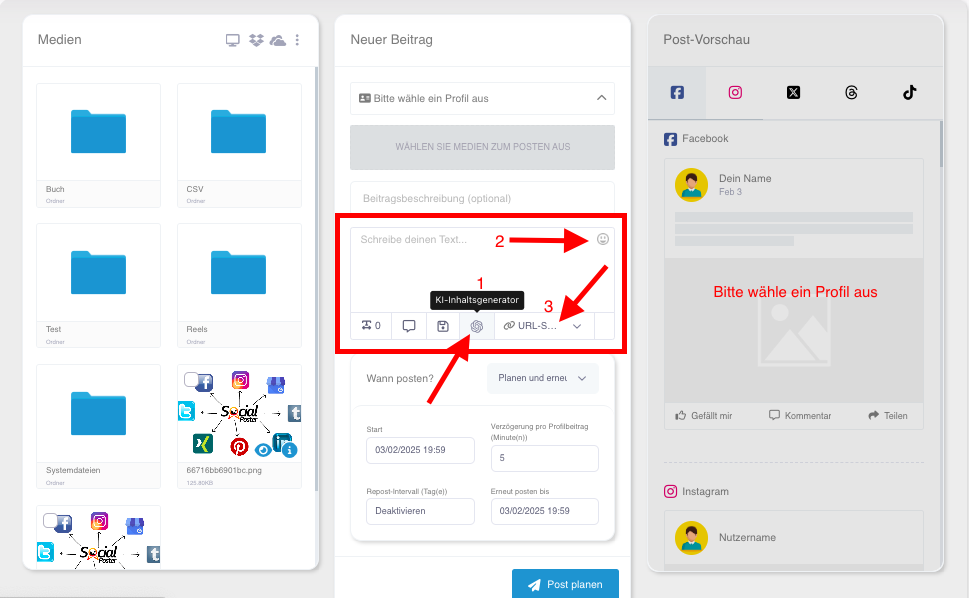
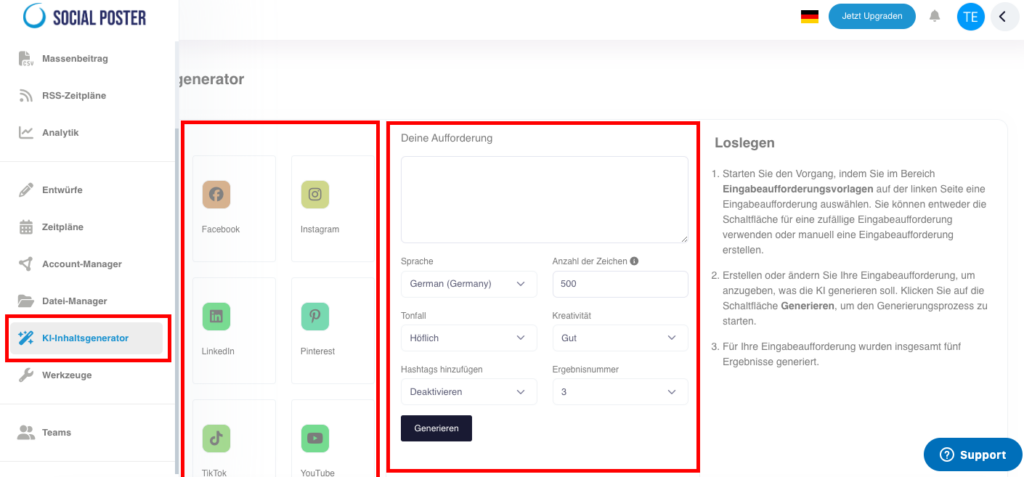
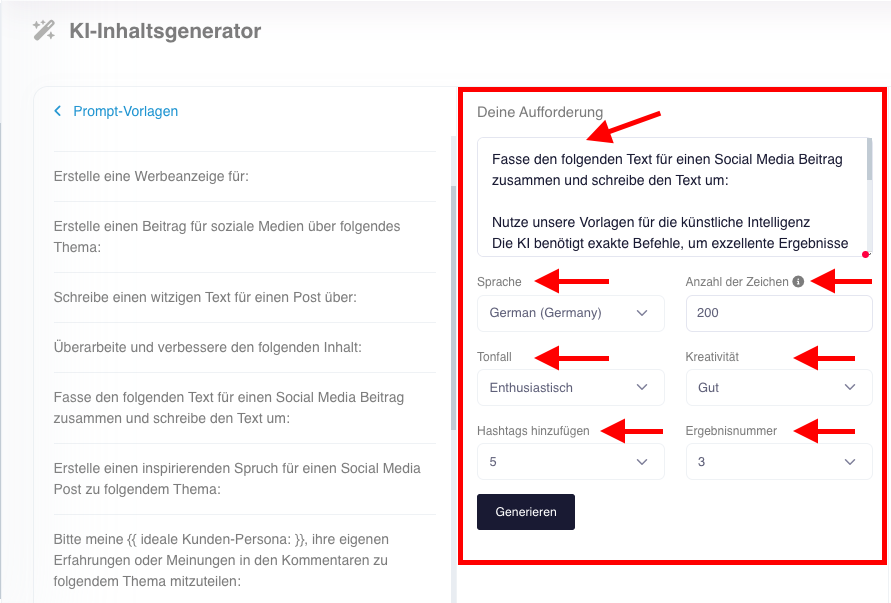
    3. Schritt-für-Schritt-Anleitung zur Verbindung

    So verbindest du dein Tumblr-Konto mit Social Poster

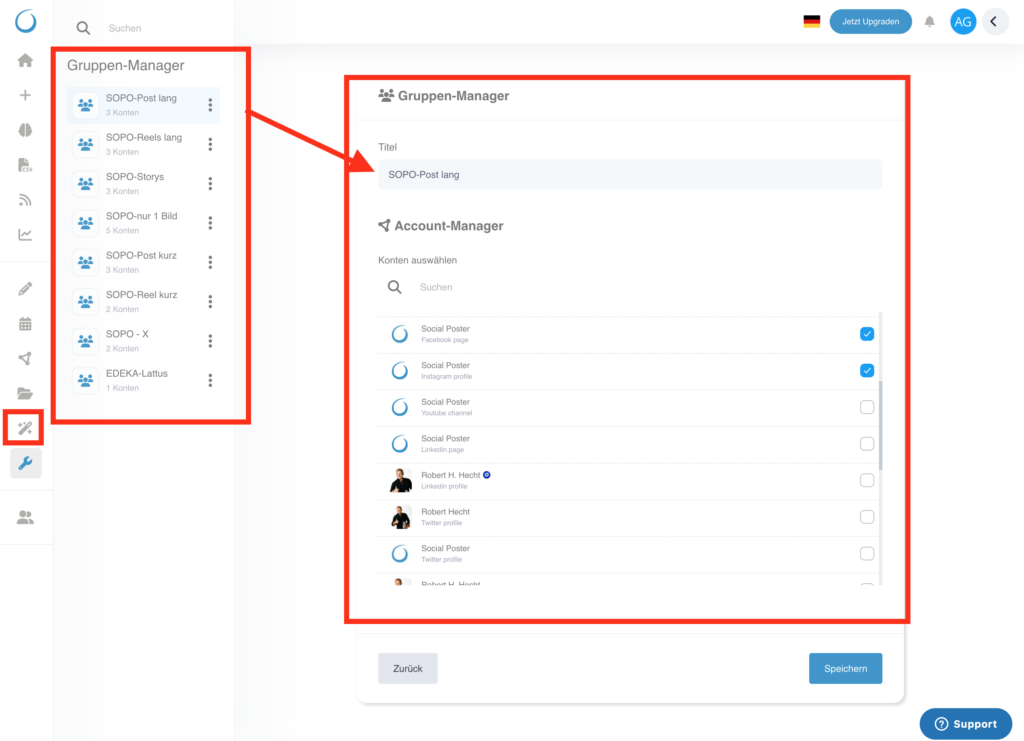
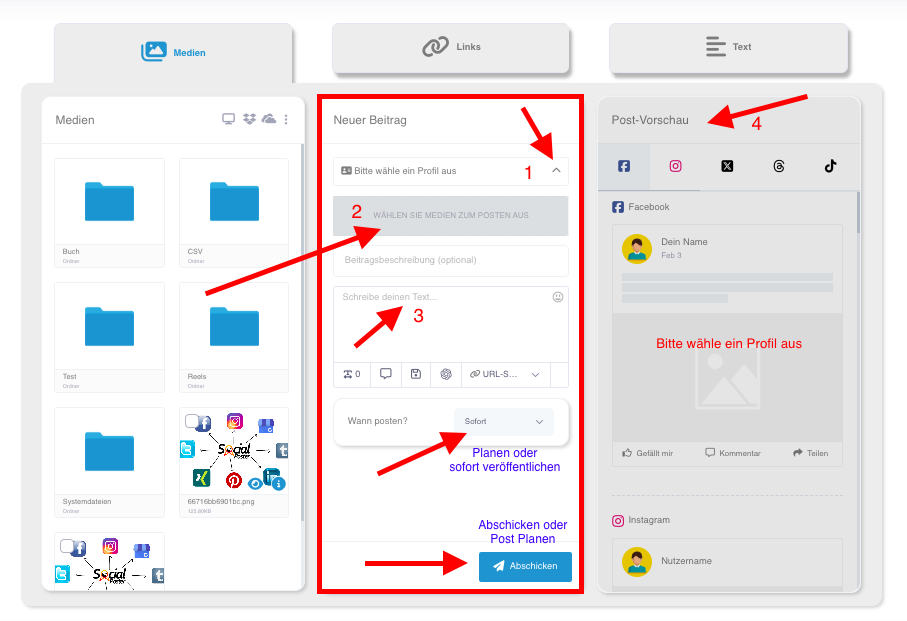
    1️⃣ Melde dich bei Social Poster an und navigiere zum Account Manager.
    2️⃣ Klicke auf „Tumblr-Blog hinzufügen“ aus der Account-Liste links oder auf "Konto hinzufügen" im Tumblr-Blogs Feld rechts.

    3️⃣ Du wirst zur Tumblr-Authentifizierungsseite weitergeleitet. Logge dich mit deinem Tumblr-Konto ein, falls du das noch nicht getan hast.

    4️⃣ Tumblr zeigt dir eine Berechtigungsanfrage. Klicke auf "Erlauben", damit Social Poster Beiträge für dich veröffentlichen kann.

    5️⃣ Wähle den Tumblr-Blog aus, auf dem du Inhalte veröffentlichen möchtest.

    6️⃣ Klicke auf „Profil hinzufügen“ – die Verbindung ist nun hergestellt!


    4. Mögliche Probleme & Lösungen

    Fehlermeldung: „Tumblr-Konto nicht gefunden“
    Lösung: Stelle sicher, dass dein Konto aktiv ist und Social Poster alle notwendigen Berechtigungen erteilt wurden.

    Beiträge werden nicht veröffentlicht
    Lösung: Überprüfe, ob dein Tumblr-Konto noch verbunden ist und ob du die API-Zugriffsrechte korrekt erteilt hast.

    Verbindung wird regelmäßig getrennt
    Lösung: Tumblr verlangt eine erneute Bestätigung nach einer bestimmten Zeit. Melde dich erneut in Social Poster an und stelle die Verbindung wieder her.

    Fehlermeldung: „Berechtigungen fehlen“
    Lösung: Überprüfe, ob du alle angeforderten Berechtigungen erteilt hast und dein Konto korrekt eingerichtet ist.


    5. Spezielle Hinweise

    Tumblr erlaubt nur das Posten eines einzelnen Bildes pro Beitrag über Social Poster – Videos und Karussell-Posts werden nicht unterstützt.
    Hashtags sind auf Tumblr relevant und helfen dabei, Inhalte in der Suche sichtbarer zu machen.
    Interaktionen wie Reblogs, Likes oder Kommentare können nicht automatisiert werden.
    Regelmäßige Verbindungserneuerung erforderlich – Tumblr setzt Sicherheitsmaßnahmen für Drittanbieter-Tools ein.

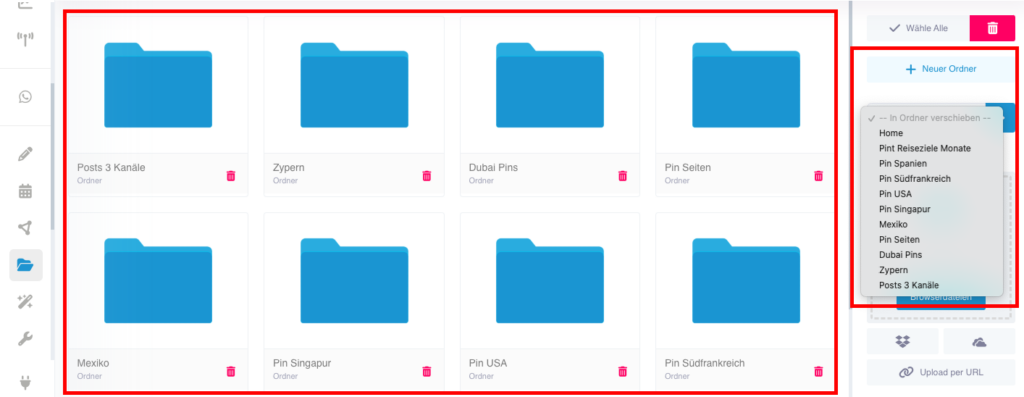
    Tipp: Falls du mehrere Tumblr-Blogs verwaltest, kannst du diese ebenfalls mit Social Poster verbinden und zentral im Dashboard verwalten.

  • File Manager

    File Manager is the central tool for managing all media you have in your
    Want to use social media posts. It offers clear organization and practical editing options for images, videos and other file formats.

    10.1 What is File Manager?

    • Definition:A central location within social posters where you can image,
      Can manage videos, audio files, PDFs and other content.
    • Main benefits:
      • Organization:Keep your media structured and handy.
      • Efficiency:Paste files directly into posts without having to upload them each time.
      • Editing:Customize media directly in the tool with the integrated image editing program.

    10.2 Which files are supported?

    File Manager supports a variety of file formats:

    • Pictures:Jpeg, png
    • Videos:Mp4, mov
    • Audio:Mp3, wav
    • Documents:Pdf, csv

    10.3 How does File Manager work?

    A. Upload files

    • Direct upload:
      • Upload files from your computer.
      • Click on the Upload File button and select the one you want
        files out.
      • Alternatively, you can drag and drop files into File Manager.
    • External sources:
      • Access content from Dropbox, OneDrive, or from a URL.
      • Click Add External Source and log in to the respective platform to import files.

    B. Organize files

    • Create folders:
      • Create folders to sort media thematically (e.g. B. Product photos, videos for Campaign X).
      • Rename folders or move files between folders.

    • Manage storage:
      • The file manager shows the total available space and the
        memory currently used.
      • Delete files that are not needed to make room. Never delete files for posts that are pre-scheduled, otherwise they won’t be posted. Already published posts whose content can be deleted, unless they are interval posts that are published multiple times.

    C. Edit files

    • Image editing:
      • Open images with a built-in editor.
      • Editing options:
        • Crop, scale and rotate.
        • Apply filters and color corrections.
        • Add text, graphics or logos.
      • Save changes directly to File Manager.
    • Video preview:
      • Play videos directly in File Manager to check their contents.

    10.4 Advanced functions

    • Adobe Express integration:
      • Edit images or videos directly from Adobe Express and save the results in File Manager.
      • Create professional graphics or animated content, videos, reels and stories
      • No paid Adobe Express account is required, it can also be used with the free one. However, a free Adobe Express account should be created to save the graphics, images or videos created in the Social Poster File Manager.

    • Show metadata:
      • Check file information such as file size, resolution, and creation date.

    10.5 Common use cases

    • Campaign management:
      • Collect all media for a specific campaign in a folder, e.g. B. Christmas campaign.
    • Teamwork:
      • Provide team members with access to files they need without having to share them via email.
    • Fast processing:
      • Edit images or videos directly in the tool to save time.
    • Content recycling:
      • Save frequently used media to reuse in future posts.

    10.6 Benefits of File Manager

    • Efficiency:Media is uploaded once and can be
      be reused.
    • Organization:Clear folder structure for a better overview.
    • Creativity:Integrated editing tools enable professional adjustments directly in the tool.
    • Storage management:Keep track of your available resources.

    10.7 Tips for optimal use

    • Clear folder structure:
      • Create folders based on campaigns, platforms, or periods.
    • Regular cleaning:
      • Delete outdated or unnecessary files to free up space.
    • Add watermarks:
      • Use the editing options to place logos or text as watermarks on images and videos.
    • Adobe Express integration:
      • Use Adobe Express for more complex edits and save the results directly to File Manager.

    10.8 Frequently Asked Questions

    • How much storage space is available to me?
      • The available space depends on your social poster plan and appears in File Manager.
    • Can I recover files if I deleted them?
      • Deleted files cannot be recovered. Check them carefully before deleting.
    • Can I share files with my team?
      • Yes, files in File Manager can be used by team members who have access to the project.
    • Which formats does Adobe Express support?
      • Adobe Express supports editing popular formats such as JPEG, PNG, and MP4.

    10.9 Practical examples

    • Marketing team:Organizes images and videos for a new product campaign
      in a folder and edits them with Adobe Express.
    • A social media manager:Uses File Manager to create visual content for
      Provide regular contributions quickly.
    • A content creator:Saves frequently used templates for Instagram stories
      and adjust them as needed.

    10.10 Benefits for companies

    • Agencies:Manage the media of multiple customers centrally and organize them into
      separate folders.
    • E-commerce:Upload product images and videos to reuse for different campaigns.
    • Content Creator:Keep all your media clear in one place and save time when creating content.

    The file manager in social poster is a powerful tool to make media efficient
    organize, edit and prepare for social media posts. With Adobe Express integration and advanced editing capabilities, it offers a perfect combination of functionality and creativity.

  • Wie verbinde ich mein Instagram Profil mit meiner Facebook Seite?

    1. Einführung

    Damit du Instagram mit Social Poster verbinden kannst, muss dein Instagram-Konto mit einer Facebook-Seite verknüpft sein. Diese Verknüpfung ermöglicht den Zugriff über die Facebook API und ist erforderlich, um Beiträge automatisch zu planen und zu veröffentlichen.

    Warum ist die Verknüpfung wichtig?

    ✔ Ermöglicht die Nutzung von Drittanbieter-Tools wie Social Poster
    ✔ Erforderlich für automatische Instagram-Postings
    ✔ Erlaubt Zugriff auf Instagram-Insights über das Facebook Business-Tool

    2. Voraussetzungen

    Bevor du dein Instagram-Profil mit deiner Facebook-Seite verbinden kannst, stelle sicher, dass du folgende Punkte erfüllst:

    Dein Instagram-Konto muss ein „Professionelles Konto“ sein (Business oder Creator)
    Privat-Accounts können nicht verbunden werden!

    Du bist Administrator oder Redakteur der Facebook-Seite
    ➡ Falls du keine Administratorrechte hast, benötigst du die Hilfe des Seiteninhabers.

    Du hast Zugriff auf die Facebook-Einstellungen der Seite

    Hinweis: Falls dein Instagram-Konto aktuell ein persönliches Konto ist, musst du es zuerst in ein Business- oder Creator-Konto umwandeln.

    3. Schritt-für-Schritt Anleitung zur Verknüpfung

    So verknüpfst du dein Instagram-Profil mit deiner Facebook-Seite

    Als Erstes ist hier beschrieben wie du dein Instagram Profil als professionelles Profil umwandelst

    Gehe zu Instagram in dein Profil und klicke, wie im Bild zu sehen ist, auf "Profil bearbeiten"

    Scrolle im nächsten Bildschirm gegebenenfalls runter und klicke auf den Menüpunkt "Kontoart und Tools"


     Klicke hier auf "Zu professionelles Konto wechseln"


    Klicke hier auf "Unternehmen"

    Hier auf "Weiter" 


    Hier wählst du eine Kategorie aus, die zu deinem Profil am besten passt. Oben kannst du noch auswählen, ob diese Kategorie in deinem Profil angezeigt werden soll oder nicht. Klicke dann auf "Fertig"

    Gib hier deine Kontaktinformationen einen und hake oben an, dass diese im Profil angezeigt werden. Deine Interessenten, die dich in Instagram finden, sollen dich doch kontaktieren können, oder?

    Klicke auf "Speichern" 

    Klicke hier auf "Fertig"


    Ab hier verbinden wir jetzt auf Facebook deine Facebook-Seite mit deinem gerade frisch umgewandelten Instagram-Profil Business. Solltest du schon ein Instagram Business Profil haben und deine Facebook-Seite damit verknüpfen wollen, dann kannst du direkt hier weitermachen.

    Logge dich in Facebook ein. Klicke oben rechts auf dein Profilbild und dann auf "Alle Profile ansehen"


    Wähle deine Facebook-Seite aus, die du mit deinem Instagram-Profil Business verbinden möchtest.


    Jetzt bist du in deiner Facebook-Seite eingeloggt und kannst auf deren Menü zugreifen. Da klickst du jetzt gleich links auf "Professional-Dashboard".
    Scrolle ein wenig runter und wähle "Verknüpfte Konten" aus.


    Wähle hier Instagram aus. Falls hier schon ein anderes Instagram-Konto verbunden ist, entferne es und füge das neue hinzu.


    Klicke auf "Konto verknüpfen"


    Klicke hier auf "Verknüpfen"


    Schiebe hier den Schieberegler auf gestatten und klicke auf "Weiter"

    Gib hier deine Instagram-Zugangsdaten ein und folge den weiteren Anweisungen.


    Somit ist dein Instagram-Profil Business mit deiner Facebook-Seite verknüpft. Hier in dieser Einstellung kannst du auch dein Instagram-Profil wieder trennen und auch ein anderes verknüpfen.


    4. Mögliche Probleme & Lösungen

    Fehlermeldung: „Diese Instagram-Seite ist bereits mit einem anderen Konto verbunden“
    Lösung: Prüfe in den Instagram-Einstellungen, ob dein Konto bereits mit einer anderen Facebook-Seite verknüpft ist. Falls ja, entferne die alte Verbindung.

    Ich kann mein Instagram-Konto nicht in den Facebook-Seiteneinstellungen sehen
    Lösung: Stelle sicher, dass du Administratorrechte auf der Facebook-Seite hast.
    Lösung: Stelle sicher, dass dir im Business Manager die Facebook-Seite und das Instagram-Profil zugeteilt wurden und die Administratorrechte hast. (das ist der häufigste Fehler, wenn das nicht funktioniert)

    Beiträge werden trotz Verknüpfung nicht veröffentlicht im Social Poster
    Lösung: Manchmal müssen Berechtigungen in den Facebook-Business-Einstellungen aktualisiert werden. Trenne die Verbindung und richte sie neu ein.


    5. Spezielle Hinweise

    Instagram Direct Messages über Facebook verwalten: Nach der Verknüpfung kannst du Instagram-DMs direkt über das Facebook-Business-Tool verwalten.

    Verknüpfung jederzeit entfernen: Falls du dein Instagram-Konto von Facebook trennen möchtest, kannst du dies in den Facebook-Seiteneinstellungen tun.

    Tipp: Falls du mehrere Instagram-Accounts hast, kannst du diese mit Facebook-Seiten verknüpfen und in Social Poster verwalten.

    Das ist die vollständige Schritt-für-Schritt-Anleitung zur Instagram-Facebook-Verknüpfung. Ist das so für dich passend oder soll ich noch etwas ergänzen?

  • Tools

    The Tools section in Social Posters provides you with a number of useful tools to
    Plan, organize and design your social media content more efficiently. These
    Features are designed to take your posts to the next level and give you
    to save valuable time.

    12.1 What are the tools in social posters?

    • Definition:A gathering point for various tools specially developed
      The creation, management and optimization of social media posts
      to simplify.
    • Main benefits:
      • Efficiency: Complete recurring tasks faster.
      • Organization: Keep track of texts, groups and
        Branding elements.
      • Creativity: Use tools to make content unique and professional.

    12.2 What tools are available?

    A. Text-Manager

    • Description:Save frequently used texts, such as standard hashtags,
      Call-to-action or replies, and reuse them if needed.
    • Functions:
      • Categorize texts: Create categories for different types of texts
        (e.g. for various companies or occasions such as Christmas, Black Friday, etc.).
      • Edit and update: Customize saved texts at any time.
      • Quick access: Load saved texts directly into the post editor.
      • Create high-quality in no time with our artificial intelligence
        Professional texts for your posts.
    • Benefits:Reduces the effort to insert the same texts manually over and over again.

    B. Group Manager

    • Description:Organize your social media accounts into groups to create posts
      Efficiently plan for multiple accounts simultaneously.
    • Functions:
      • Create groups: Summarize accounts for customers, projects, or campaigns.
      • Customize group names: Give meaningful names such as Christmas campaign or customer A.
      • Group post creation: Schedule posts that are published simultaneously to all accounts of a group.
    • Benefits:Saves time and ensures consistent campaigns across multiple channels.

    C. Watermarks

    • Description:Automatically add a watermark to your images and videos
      Add to protect your branding and personalize your content.
    • Functions:
      • Logo upload: Upload your company logo as PNG or JPG to use as a watermark.
      • Customization options: Flexibly adjust position, transparency and size of the watermark.
      • Platform-specific: Customize the watermark for different platforms (e.g. B. Bigger logos for Instagram).
    • Benefits:Protects your content from unauthorized use and strengthens your branding.

    12.3 Advanced functions of tools

    • Automation:
      • Automatically load saved texts or watermarks into the post editor to speed up workflow.
    • Fuses:
      • Save versions of watermarks or texts to use for different campaigns.

    12.4 Common use cases

    • Save standard answers:
      • Use Text Manager to save answers for common questions or standard captions.
    • Campaigns bundle:
      • Organize social media accounts in groups to make campaigns unified across multiple channels.
    • Brand recognition:
      • Use watermarks to make sure your images and videos can always be associated with your business.

    12.5 Benefits of tools

    • Efficiency:Automate recurring tasks to have more time for creative work.
    • Professionalism:Make sure your content is consistent and brand compliant.
    • Flexibility:Use the tools to customize content to different platforms and audiences.

    12.6 Tips for optimal use

    • Use text managers sensibly:
      • Save regularly used hashtags or call-to-action to quickly insert into posts.
    • Strategically use groups:
      • Create groups for specific campaigns or customers to schedule posts efficiently.
    • Optimize watermarks:
      • Adjust the transparency and position of your watermark to be visible but not intrusive.
    • Test automation:
      • Combine the tools with post creation to speed up your workflow.

    12.7 Frequently asked questions (FAQ)

    • How many texts can I save in Text Manager?
      • There is no limit, you can save and categorize any number of texts.
    • Can I create multiple groups?
      • Yes, you can create as many groups as you need and manage them individually.
    • Will the watermark appear the same on all platforms?
      • The watermark is adapted to the platform. You can make separate settings for each platform.
    • Can I use watermarks for videos?
      • Yes, watermarks can be added for both images and videos.

    12.8 Practical examples

    • E-commerce shop:Uses text manager to describe product descriptions and
      Save discount codes that are used regularly.
    • Marketing agency:Organizes customer accounts in groups and plans
      Campaigns for multiple platforms simultaneously.
    • A content creator:Adds watermarks to images to protect them from theft and strengthen his brand.

    12.9 Benefits for companies

    • Agencies:Manage texts, groups and watermarks for multiple customers
      Efficient and professional.
    • E-commerce:Use saved texts and watermarks to keep content consistent
      and design brand compliant.
    • Content Creator:Stay in control of your content and increase efficiency
      your workflow.

    The Tools section in Social Posters gives you everything you need to help your
    Make content more efficient, professional and creative. With a combination of
    Text management, grouping, and branding tools can help you streamline your workflow and ensure your content is consistent and high quality.

  • Beitrag

    Der Bereich „Beitrag“ ist das zentrale Tool von Social Poster, mit dem Nutzer Social Media Inhalte individuell erstellen, anpassen und veröffentlichen können. Hier kannst du verschiedene Beitragstypen nutzen, um deine Marke professionell zu präsentieren und deine Zielgruppe effektiv anzusprechen.

    2.1 Übersicht über Beitragstypen

    Im Menüpunkt "Beitrag" stehen dir drei Haupttypen zur Verfügung:

    • Medienpost:
      • Beiträge mit Bildern oder Videos als zentralem visuellen Element.
      • Unterstützt gängige Dateiformate wie JPEG, PNG und MP4.
      • Ideal für visuelles Storytelling und Produktpräsentationen.
    •  Linkpost:
      • Beiträge, die einen direkten Link zu externen Ressourcen enthalten.
      • Automatische Vorschaugenerierung mit Titel, Bild und Beschreibung.
      • Perfekt für Blogartikel, Landingpages oder wichtige Unternehmens-Updates.
      • Der Vorteil hier ist, das z.B. in Facebook das Bild anklickbar ist und der Interessent direkt auf den Link geführt wird.
    •  Textpost:
      • Reine Textbeiträge, die keine Bilder oder Videos benötigen.
      • Hervorragend für kurze Ankündigungen, Zitate oder interaktive Fragen an die Community.


    2.2 Medienpost

    • Beschreibung:
      • Nutze Bilder und Videos, um deine Inhalte visuell ansprechend zu gestalten.
      • Dateien können aus deinem Dateimanager, von deinem Computer oder aus externen Quellen (z. B. Dropbox, OneDrive) hochgeladen werden.
      • Zusätzlich steht dir Zugriff auf Bilder- und Videodatenbanken wie Pixabay, Unsplash und Pexels zur Verfügung.
    • Funktionen:
      • Postvorschau: Zeigt dir, wie dein Beitrag auf den verschiedenen Plattformen dargestellt wird.
      • Emoji-Bibliothek: Peppe deinen Text mit passenden Emojis auf.
      • KI-Inhaltsgenerator: Generiere Texte, die perfekt zu deinem Bild oder Video passen.
      • Erweiterte Plattformoptionen:
        • Storys und Reels: Passe Beiträge an spezielle Formate wie Instagram-Storys oder Instagram und Facebook Reels an.
        • Google Unternehmensprofile: Füge Call-to-Action-Buttons mit Link hinzu.
        • Reddit: Titel eingeben
        • TikTok: Kommentar, Duett, Stich
        • YouTube: Titel, Kategorie, Tags
        • Pinterest: Titel, Link
        • Xing: Titel, Link
        • Tumblr: Tags
    • Nutzen:
      • Erstelle visuell überzeugende Inhalte, die sofort ins Auge fallen und Engagement fördern.
     
    2.3 Linkpost
      • Beschreibung:
        • Beiträge, die Links zu externen Inhalten enthalten.
        • Die Vorschau (Titel, Beschreibung, Bild) wird automatisch generiert.
      • Funktionen:
        • Textfeld: Ergänze die Linkvorschau mit einem individuellen Text.
        • URL-Shortener: Kürze lange Links, um sie ansprechender zu gestalten.
        • KI-Integration: Schreibe ansprechende Call-to-Actions, die auf den Link
          aufmerksam machen.
      • Praktischer Nutzen:
        • Teile Blogartikel, Produktseiten oder Neuigkeiten mit deinen Followern und
          leite sie auf externe Seiten.
        • Der Vorteil hier ist, dass z.B. in Facebook das Bild anklickbar ist und der
          Interessent direkt auf den Link geführt wird.

     2.4 Textpost

      • Beschreibung:
        • Erstelle Beiträge, die nur aus Text bestehen. Ideal für Plattformen, bei denen
          visuelle Inhalte optional sind.
        • Unterstützt Emojis und den KI-Inhaltsgenerator.
      • Funktionen:
        • Speichere häufig genutzte Texte im Text-Manager und lade sie bei Bedarf
          erneut.
        • Füge Hashtags hinzu, um die Sichtbarkeit des Beitrags zu erhöhen.
      • Wichtige Hinweise:
        • Einige Plattformen wie YouTube oder TikTok erfordern Medieninhalte.
          Textposts allein sind hier nicht möglich.
      • Nutzen:
        • Ideal für direkte Kommunikation mit deiner Community, wie Updates oder Fragen.


    2.5 Beitragserstellung

    • Beschreibung:
      • Ein intuitiver Workflow führt dich durch den gesamten Prozess der
        Beitragserstellung.
    • Schritte:
      1. Plattform auswählen: Wähle die Social Media Konten aus, auf denen der
        Beitrag erscheinen soll.
      2. Medien hinzufügen: Lade Bilder/Videos hoch oder wähle aus
        Stockbibliotheken.
      3. Text erstellen: Nutze Emojis, Shortlinks oder die KI für die Texterstellung.
      4. Postvorschau: Prüfe, wie der Beitrag auf den jeweiligen Plattformen
        dargestellt wird.
    • Speichern und Wiederverwenden:
      • Speichere Beiträge als Entwurf, um sie später fertigzustellen oder erneut zu
        verwenden.


    2.6 Planung und Automatisierung

    • Beschreibung:
      • Automatisiere deine Beiträge, um Zeit zu sparen, und eine regelmäßige
        Präsenz sicherzustellen.
    • Optionen:
      • Sofort veröffentlichen: Der Beitrag wird direkt nach der Erstellung gepostet.
      • Zeitplanung: Lege ein Datum und eine Uhrzeit fest, zu der der Beitrag
        veröffentlicht werden soll.
      • Wiederholungen: Plane Beiträge mit bestimmten Intervallen (z. B. alle 3
        Tage, wöchentlich oder bis zu 90 Tage).
      • Vorschau: Sieh dir geplante Beiträge im Kalender an und bearbeite sie bei Bedarf.
    • Nutzen:
      • Behalte die Kontrolle über deine Social Media Strategie, ohne jeden Beitrag
        manuell erstellen zu müssen.


    2.7 Erweiterte Funktionen

    • KI-Inhaltsgenerator:
      • Nutze die künstliche Intelligenz, um ansprechende und kreative Texte zu
        schreiben.
      • Passe den Ton (z. B. humorvoll, inspirierend) und die Länge an.
    • Emoji-Bibliothek:
      • Füge Emojis hinzu, um Beiträge lebendiger zu gestalten.
    • URL-Shortener:
      • Verwende gekürzte Links, um Platz zu sparen und eine professionelle Optik zu gewährleisten.


    2.8 Häufige Anwendungsfälle

    • Produkteinführungen:
      • Teile Bilder und Videos deiner neuen Produkte und ergänze sie mit
        überzeugenden Texten.
    • Events bewerben:
      • Erstelle Beiträge mit Eventdetails und Links zu Anmeldeseiten.
    • Community-Engagement:
      • Stelle Fragen oder teile inspirierende Zitate als Textposts.
    • Blogartikel promoten:
      • Nutze Linkposts, um deinen Blogverkehr zu steigern.


    2.9 Vorteile der Beitragsfunktion

    • Flexibilität: Unterstützt alle gängigen Beitragstypen.
    • Effizienz: Sparst Zeit durch wiederverwendbare Inhalte und Automatisierung.
    • Kreativität: Nutze KI und Emojis, um deine Inhalte zu bereichern.
    • Plattform-übergreifend: Passe Inhalte an die spezifischen Anforderungen jeder
      Plattform an.


    2.10 Tipps zur optimalen Nutzung

    1. Planung ist alles: Nutze die Kalenderfunktion, um deine Inhalte langfristig zu
      planen.
    2. Variiere Inhalte: Wechsel zwischen Text-, Medien- und Linkposts, um Abwechslung
      zu schaffen.
    3. Nutze KI und Tools: Lass dich von der KI unterstützen, um Texte schneller und
      kreativer zu erstellen.
    4. Teste Formate: Analysiere, welche Beitragstypen bei deiner Zielgruppe am besten
      ankommen und passe deine Strategie an.


    Diese detaillierte Beschreibung macht klar, wie vielseitig und leistungsstark die
    Beitragsfunktion von Social Poster ist.

  • KI-Inhaltsgenerator (ab PREMUIM)

    Der KI-Inhaltsgenerator ist ein innovatives Tool in Social Poster, das mithilfe von
    künstlicher Intelligenz (KI) ansprechende Texte für Social-Media-Beiträge erstellt. Die Funktion ist ideal, um kreative, informative und zielgerichtete Inhalte zu generieren – schnell und effizient.

    11.1 Was ist der KI-Inhaltsgenerator?

    • Definition: Ein Textgenerator, der auf Basis von Prompts (Anweisungen) automatisch Inhalte für Social-Media-Beiträge erstellt.
    • Hauptvorteile:
      • Zeitersparnis: Generiere Texte in wenigen Sekunden.
      • Kreativität: Die KI liefert frische und originelle Ideen.
      • Flexibilität: Passe Sprache, Tonalität und Textlänge an deine Zielgruppe und Plattform an.


    11.2 Wie funktioniert der KI-Inhaltsgenerator?

    A. Inhalte erstellen

    • Prompt eingeben:
      • Schreibe eine kurze Anweisung, z. B.:
        • „Erstelle einen motivierenden Beitrag über die Vorteile von
          Teamarbeit.“
        • „Schreibe einen humorvollen Text über die Herausforderungen im Homeoffice.“

    • Parameter festlegen:
      • Wähle die Sprache aus
      • Wähle die Tonalität:
        • Höflich: Für formelle Beiträge.
        • Witzig: Für informelle und freundliche Inhalte.
        • Enthusiastisch: Für motivierende Posts.
        • Freundlich: Für unterhaltsame Inhalte.
        • Informativ: Für sachliche Beiträge, klar und strukturiert
        • Lustig: Für humorvolle Inhalte, die Aufmerksamkeit erregen
      • Füge Hashtags hinzu
      • Wähle die Anzahl der Zeichen
      • Kreativität:
        • Wirtschaftlich
        • Normal
        • Gut
        • Premium
      • Die Anzahl der gewünschten Ergebnisse

    • Text generieren:
      • Klicke auf „Generieren“, und die KI erstellt in wenigen Sekunden einen vollständigen Text nach deinen Einstellungen.

    • Nutze unsere Prompt-Vorlagen:
      • Empfohlen: Allgemeine Prompts für Social Media Texte
      • Facebook: Speziell für Facebook optimierte Prompts
      • Instagram: Speziell für Instagram optimierte Prompts
      • X (früher Twitter): Speziell für X optimierte Prompts
      • LinkedIn: Speziell für LinkedIn optimierte Prompts
      • Pinterest: Speziell für Pinterest optimierte Prompts
      • Google Unternehmensprofile: Speziell für Google My Business optimierte Prompts
      • TikTok: Speziell für TikTok optimierte Prompts
      • YouTube: Speziell für YouTube optimierte Prompts

    B. Texte bearbeiten

    • Live-Bearbeitung: Ändere den generierten Text direkt im Editor.
    • Duplikation: Erstelle Varianten des Textes für verschiedene Plattformen.
    • Zwischenspeichern: Speichere generierte Inhalte im Text-Manager, um sie später wiederzuverwenden.


    C. Texte integrieren
    • Füge den generierten Text direkt in deine Social-Media-Beiträge ein.
    • Kombiniere den Text mit Medien aus dem Datei-Manager.


    11.3 Erweiterte Funktionen

    • Hashtag-Generierung:
      • Automatische Erstellung relevanter Hashtags basierend auf dem Textinhalt.
    • Plattformoptimierung:
      • Passen Sie die Inhalte an spezifische Anforderungen der Plattformen an


    11.4 Häufige Anwendungsfälle

    • Content-Ideen entwickeln:
      • Lass die KI Vorschläge für neue Themen oder Serien-Posts generieren.
    • Zeit sparen:
      • Erstelle in wenigen Minuten ansprechende Beiträge für mehrere Plattformen.
    • Kampagnen unterstützen:
      • Nutze die KI, um Texte für eine Produktkampagne oder ein Event zu erstellen.
    • Lokale Anpassungen:
      • Passe Inhalte an verschiedene Regionen oder Zielgruppen an, z. B. mit lokalisierten Prompts.


    11.5 Vorteile des KI-Inhaltsgenerators

    • Effizienz: Generiere Texte schneller als je zuvor, ohne Qualitätseinbußen.
    • Kreativität: Die KI bietet frische Ideen, wenn du selbst keine Inspiration hast.
    • Konsistenz: Erstelle Beiträge, die zu deinem Markenstil passen.
    • Flexibilität: Optimiere Texte für verschiedene Plattformen und Zielgruppen.


    11.6 Tipps zur optimalen Nutzung

    • Präzise Prompts verwenden:
      • Je genauer deine Anweisungen, desto passender sind die Ergebnisse.
    • Mehrere Varianten testen:
      • Generiere mehrere Textversionen und wähle die beste aus.
    • Plattformanforderungen beachten:
      • Passe die Länge und den Stil des Textes an die Zielplattform an.
    • Kombinieren:
      • Ergänze die generierten Texte mit deinen eigenen Ideen oder visuellen
        Inhalten.


    11.7 Häufige Fragen (FAQ)

    • „Kann ich die Texte anpassen?“
      • Ja, du kannst die generierten Texte direkt im Editor bearbeiten.
    • „Wie viele Texte kann ich generieren?“
      • Es gibt keine Begrenzung, du kannst so viele Texte generieren, wie du
        benötigst.
    • „Welche Sprachen unterstützt der KI-Inhaltsgenerator?“
      • Der Generator unterstützt mehrere Sprachen, darunter Deutsch, Englisch, Spanisch und Französisch.
    • „Kann ich den Text speichern?“
      • Ja, du kannst generierte Inhalte im Text-Manager speichern und später wiederverwenden. Du kannst die Texte auch direkt im Text-Manager mit dem KI-Inhaltsgenerator generieren und speichern.


    11.8 Praktische Beispiele

    • Ein Content Creator: Nutzt den KI-Inhaltsgenerator, um in wenigen Minuten
      Captions für Instagram zu erstellen.
    • Ein Marketing-Team: Entwickelt Texte für eine neue Produktkampagne mit einem
      einheitlichen Stil.
    • Eine Agentur: Generiert mehrere Textvarianten, die anschließend mit Kunden abgestimmt werden.


    11.9 Vorteile für Unternehmen

    • Agenturen: Bieten Kunden schneller Content-Ideen und reduzieren die
      Erstellungskosten.
    • E-Commerce: Erstelle Produktbeschreibungen und Werbetexte in kürzester Zeit.
    • Content Creator: Bleib kreativ und produktiv, auch wenn dir die Ideen ausgehen.


    11.10 Visuelle Anleitung für den KI-Inhaltsgenerator

    • Text erstellen
      • Schritt 1: Öffne den KI-Inhaltsgenerator im Menü.
      • Schritt 2: Gib einen Prompt ein, z. B. „Erstelle einen Beitrag über die Vorteile von
        Social-Media-Marketing“ oder wähle eine unserer Promptvorlagen aus.
      • Schritt 3: Wähle Tonalität und Textlänge aus.
      • Schritt 4: Klicke auf „Generieren“, um den Text zu erstellen.
    • Text bearbeiten
      • Bearbeite den Text direkt im Editor.
      • Füge z. B. noch Hashtags oder Call-to-Actions hinzu.
      • Speichere den Text oder füge ihn direkt einem Beitrag hinzu.
    • Text speichern
      • Klicke auf „Speichern“, um den Text im Text-Manager abzulegen.
      • Organisiere gespeicherte Texte nach Themen oder Kampagnen.


    Der KI-Inhaltsgenerator in Social Poster ist ein unverzichtbares Werkzeug für alle, die
    Social Media Inhalte schneller, kreativer und zielgerichteter erstellen möchten. Mit seinen
    flexiblen Funktionen und der einfachen Bedienung macht er das Content-Erstellen effizienter
    als je zuvor.

  • How do I connect my Instagram profile to my Facebook page?

    1. Introduction

    In order to connect Instagram to social posters, yourInstagram account linked to a Facebook page. . This link allows access via the Facebook API and is required to automatically schedule and publish posts.

    Why is linking important?

    ✔ Allows the use of third-party tools such as social posters
    ✔ Required for automatic Instagram posts
    ✔ Allows access to Instagram insights through the Facebook Business tool

    2. Requirements

    Before you can connect your Instagram profile to your Facebook page, make sure you meet the following:

    Your Instagram account must be a professional account(Business or Creator)
    Private accounts cannot be connected!

    You are administrator or editor of the Facebook page
    ➡ If you do not have administrator rights, you need the help of the site owner.

    You have access to the Facebook settings of the page

    Note:If your Instagram account is currentlypersonal accountYou have to put it first into aBusiness or Creator accountconvert.

    3. Step-by-step instructions for linking

    How to link your Instagram profile to your Facebook page

    First, here’s how to convert your Instagram profile as a professional profile

    Go to Instagram in your profile and click on „Edit Profile“ as you can see in the picture

    Scroll down in the next screen if necessary and click on the menu item „Account type and tools“

    Click here on „Switch to professional account“


    Click on „Company“ here

    Here on „Next“


    Here you select a category that best suits your profile. Above, you can choose whether or not this category should appear in your profile. Then click on „Done“

    Enter your contact information here and check that it appears in the profile above. Your prospects who find you on Instagram should be able to contact you, right?

    Click on „Save“

    Click on „Done“ here

    From here, we now connect your Facebook page to your newly converted Instagram profile business on Facebook. If you already have an Instagram business profile and want to link your Facebook page to it, you can continue right here.

    Log in to Facebook. Click on your profile picture in the top right corner and then on „View all profiles“


    Select the Facebook page you want to connect to your Instagram profile Business.

    Now you are logged into your Facebook page and can access their menu. Click on „Professional Dashboard“ on the left.
    Scroll down a little and select „Linked Accounts.“


    Select Instagram here. If there’s another Instagram account connected here, remove it and add the new one.


    Click on „Link account“

    Click on „Link“ here

    Slide the slider here and click on „Next“

    Enter your Instagram credentials here and follow the instructions below.


    Thus, your Instagram profile Business is linked to your Facebook page. Here in this setting you can also separate your Instagram profile again and link another one.

    4. Possible problems & solutions

    Error message: This Instagram page is already connected to another account
    Solution:Check Instagram settings to see if your account is already linked to another Facebook page. If so, remove the old connection.

    I can’t see my Instagram account in Facebook page settings
    Solution:Make sure that youAdministrator rightson the Facebook page.
    Solution:Make sure you inBusiness Managerthe Facebook page and Instagram profile have been assigned andAdministrator rightshave. (This is the most common mistake if it doesn’t work)

    Posts are not published in the social poster despite linking
    Solution:Sometimes permissions need to be updated in Facebook business settings. Disconnect the connection and re-set it.

    5. Special hints

    Manage Instagram Direct Messages through Facebook: After linking, you can manage Instagram DMs directly from the Facebook business tool.

    Remove linkage: If you want to separate your Instagram account from Facebook, you can do so in Facebook page settings.

    Tip:If you have multiple Instagram accounts, you can link them to Facebook pages and manage them in social posters.

    This is the completeInstagram Facebook link step-by-step guide. . Is this so suitable for you or should I add something else?

  • Teams (ab PREMUIM)

    Der Bereich „Teams“ in Social Poster ist speziell dafür entwickelt, die Zusammenarbeit zwischen Teammitgliedern zu erleichtern. Mit klar definierten Rollen und Zugriffsrechten können Teams effizienter arbeiten und Social-Media-Kampagnen besser verwalten.

    13.1 Was ist der Teams-Bereich?

    • Definition: Eine Funktion, mit der du Teammitglieder einladen, ihnen Rollen
      zuweisen und deren Zugriff auf spezifische Bereiche der Plattform steuern kannst.
    • Hauptvorteile:
      • Zusammenarbeit: Erleichtert die Arbeit an gemeinsamen Projekten.
      • Transparenz: Definierte Rollen sorgen für klare Verantwortlichkeiten.
      • Sicherheit: Begrenze den Zugriff auf sensible Bereiche, um Missbrauch zu vermeiden.


    13.2 Funktionen des Teams-Bereichs


    A. Teammitglieder einladen

    • Beschreibung: Lade neue Mitglieder per E-Mail ein und füge sie deinem Social Poster Team hinzu.
    • Funktionen:
      • Einladung per E-Mail.
      • Übersicht aller eingeladenen Mitglieder mit ihrem aktuellen Status.
    • Nutzen: Ermöglicht eine einfache und schnelle Integration neuer Teammitglieder.


    B. Rollen und Berechtigungen
    • Beschreibung: Weise Teammitgliedern spezifische Rollen zu, um ihre Zugriffsrechte
      zu definieren.
    • Verfügbare Rollen:
      • Administrator: Volle Kontrolle über alle Funktionen und Einstellungen.
      • Editor: Kann Inhalte erstellen, bearbeiten und veröffentlichen.
      • Viewer: Hat nur lesenden Zugriff, um Inhalte oder Statistiken anzusehen.
      • Rechtevergabe: Gib genau die Rechte und Menüpunkte frei, die dein Teammitglied bearbeiten darf.
    • Nutzen: Sorgt für klare Verantwortlichkeiten und schützt sensible Daten.

    C. Projekte zuweisen

    • Beschreibung: Begrenze den Zugriff von Teammitgliedern auf bestimmte Projekte
      oder Kundenkonten.
    • Funktionen:
      • Zuweisung von spezifischen Plattformen, Gruppen oder Kampagnen.
      • Übersicht über zugewiesene Projekte für jedes Teammitglied.
    • Nutzen: Stellt sicher, dass Teammitglieder nur Zugang zu relevanten Bereichen haben.


    13.4 Häufige Anwendungsfälle

    • Agentur-Workflows:
      • Eine Agentur kann für jeden Kunden spezifische Projektgruppen erstellen und Teammitgliedern Zugriff darauf geben.
    • Freigabeprozess:
      • Beiträge können von einem Editor erstellt und von einem Administrator überprüft werden, bevor sie live gehen.
    • Sicherheitsmanagement:
      • Beschränke den Zugriff von temporären Mitarbeitern oder Freelancern auf bestimmte Projekte oder Funktionen.


    13.5 Vorteile des Teams-Bereichs

    • Effizienz: Erleichtert die Zusammenarbeit, indem Teammitglieder gezielt an Aufgaben arbeiten können.
    • Kontrolle: Verhindert Fehler und Missbrauch durch klar definierte Rollen und Berechtigungen.
    • Flexibilität: Passt sich den Anforderungen von Teams jeder Größe an.


    13.6 Tipps zur optimalen Nutzung

    • Rollen klar definieren: Weise jedem Teammitglied eine Rolle zu, die seinen
      Aufgaben und Verantwortlichkeiten entspricht.
    • Projekte organisieren: Nutze die Zuweisungsfunktion, um den Überblick über
      Kunden oder Kampagnen zu behalten.
    • Regelmäßige Überprüfung: Kontrolliere regelmäßig die Aktivitätsprotokolle, um
      Effizienz und Fehler zu analysieren.
    • Temporäre Zugriffe: Erteile Freelancern oder externen Mitarbeitern nur vorübergehenden Zugriff.


    13.7 Häufige Fragen (FAQ)

    • „Wie viele Teammitglieder kann ich hinzufügen?“
      • Die maximale Anzahl hängt von deinem Social Poster Plan ab.
    • „Kann ich die Rollen eines Teammitglieds ändern?“
      • Ja, Rollen können jederzeit angepasst werden.
    • „Kann ich den Zugriff auf bestimmte Konten oder Plattformen einschränken?“
      • Ja, die Zuweisungsfunktion ermöglicht eine gezielte Zugriffsbeschränkung.
    • „Was passiert, wenn ein Teammitglied das Unternehmen verlässt?“
      • Du kannst das Mitglied aus dem Team entfernen, wodurch alle Zugriffe sofort
        deaktiviert werden.


    13.8 Praktische Beispiele

    • Ein Content-Team: Ein Editor erstellt die Inhalte, während ein Administrator sie
      überprüft und freigibt.
    • Eine Agentur: Ordnet Teammitgliedern spezifische Kundenprojekte zu und verfolgt
      deren Fortschritt.
    • Ein Start-up: Nutzt den Teams-Bereich, um Freelancern nur für bestimmte Kampagnen Zugriff zu gewähren.


    13.9 Vorteile für Unternehmen

    • Agenturen: Verwalte große Teams mit mehreren Kunden effizient.
    • E-Commerce: Koordiniere interne und externe Mitarbeiter für Marketingkampagnen.
    • Content Creator: Arbeite mit Assistenten und Beratern zusammen, ohne die
      Kontrolle über deine Konten zu verlieren.


    Der Bereich „Teams“ in Social Poster ist ein unverzichtbares Werkzeug, um die Zusammenarbeit in deinem Team zu optimieren. Mit klar definierten Rollen, spezifischen Zugriffsbeschränkungen und einem übersichtlichen Protokoll für Aktivitäten kannst du sicherstellen, dass Projekte effizient und sicher abgewickelt werden.

  • contribution

    The Post section is the central tool of social poster that allows users to create, customize and publish social media content. Here you can use different types of posts to present your brand professionally and address your target group effectively.

    2.1 Overview of post types

    In the menu item „Contribution“ you have three main types available:

    • Media post:
      • Posts with images or videos as a central visual element.
      • Supports popular file formats such as JPEG, PNG and MP4.
      • Ideal for visual storytelling and product presentations.
    • Linkpost:
      • Posts that contain a direct link to external resources.
      • Automatic preview generation with title, image and description.
      • Perfect for blog articles, landing pages or important corporate updates.
      • The advantage here is that, for example, the image can be clicked on and the interested party is guided directly to the link.
    • Textpost:
      • Pure text posts that don’t need pictures or videos.
      • Excellent for short announcements, quotes or interactive questions to the community.

    2.2 Media post

    • Description:
      • Use images and videos to make your content visually appealing.
      • Files can be stored from your file manager, computer, or external sources (e.g. B. Dropbox, OneDrive) are uploaded.
      • In addition, you have access to image and video databases such as Pixabay, Unsplash and Pexels.
    • Functions:
      • Post Preview: Shows you how your post is displayed on the different platforms.
      • Emoji Library: Spice up your text with matching emojis.
      • AI Content Generator: Generate texts that fit your image or video perfectly.
      • Advanced platform options:
        • Stories and reels:Customize posts to specific formats such as Instagram stories or Instagram and Facebook reels.
        • Google companies:Add call-to-action buttons with link.
        • Reddit:Enter title
        • TikTok:Comment, duet, engraving
        • YouTube:Title, category, tags
        • Pinterest:Title, link
        • Xing:Title, link
        • Tumblr:Tags
    • Benefits:
      • Create visually compelling content that catches the eye and encourages engagement.

    2.3 Linkpost

      • Description:
        • Posts that contain links to external content.
        • The preview (title, description, image) is generated automatically.
      • Functions:
        • Text box: Add individual text to the link preview.
        • URL shorts: Short long links to make them more engaging.
        • AI integration: Write engaging call-to-actions on the link
          Draw attention.
      • Practical benefits:
        • Share blog articles, product pages or news with your followers and
          Redirect them to external sites.
        • The advantage here is that e.g. in Facebook the image can be clicked and the
          Interested parties are led directly to the link.

    2.4 Textpost

      • Description:
        • Create posts that consist only of text. Ideal for platforms where
          Visual content is optional.
        • Supports emojis and AI content generator.
      • Functions:
        • Save frequently used texts in Text Manager and load them as needed
          again.
        • Add hashtags to increase the visibility of the post.
      • Important notes:
        • Some platforms like YouTube or TikTok require media content.
          Text posts alone are not possible here.
      • Benefits:
        • Ideal for direct communication with your community, such as updates or questions.

    2.5 Contribution

    • Description:
      • An intuitive workflow guides you through the entire process of
        contributing.
    • Steps:
      1. Select platform: Select the social media accounts on which the
        post should appear.
      2. Add media: Upload images/videos or select
        Stock libraries.
      3. Create text: Use emojis, short links, or AI for copywriting.
      4. Post Preview: Check how the post is on the respective platforms
        is presented.
    • Save and reuse:
      • Save posts as a draft to finish later or resume
        use.

    2.6 Planning and automation

    • Description:
      • Automate your posts to save time, and a regular
        Ensure presence.
    • Options:
      • Publish immediately: The post will be posted immediately after creation.
      • Schedule: Set a date and time at which the post
        should be published.
      • Repeats: Plan posts with specific intervals (e.g. B. All 3
        Days, weekly or up to 90 days).
      • Preview: View scheduled posts in the calendar and edit them as needed.
    • Benefits:
      • Stay in control of your social media strategy without any post
        You have to create manually.

    2.7 Advanced functions

    • AI-generator:
      • Use artificial intelligence to create engaging and creative texts
        writing.
      • Adjust the tone (e.g. B. humorous, inspiring) and the length.
    • Emoji library:
      • Add emojis to make posts more vivid.
    • URL-short:
      • Use shortened links to save space and ensure a professional look.

    2.8 Common use cases

    • Products launches:
      • Share images and videos of your new products and add them
        convincing texts.
    • Apply events:
      • Create posts with event details and links to login pages.
    • Community engagement:
      • Ask questions or share inspiring quotes as text posts.
    • Promote blog articles:
      • Use link posts to increase your blog traffic.

    2.9 Benefits of the contribution function

    • Flexibility:Supports all common post types.
    • Efficiency:Save time through reusable content and automation.
    • Creativity:Use AI and emojis to enrich your content.
    • Cross-platform:Customize content to the specific needs of each
      platform on.

    2.10 Tips for optimal use

    1. Planning is everything:Use the calendar function to keep your content long-term
      planning.
    2. Variety content:Switch between text, media and link posts for variety
      to create.
    3. Use AI and tools:Let AI support you to help texts faster and
      Creating more creatively.
    4. Test formats:Analyze which post types are best for your target audience
      Arrive and adjust your strategy.

    This detailed description makes clear how versatile and powerful the
    The post function of social poster.

  • AI content generator (from PREMUIM)

    The AI content generator is an innovative tool in social posters that uses
    artificial intelligence (AI) creates appealing texts for social media posts. The feature is ideal for generating creative, informative and targeted content – quickly and efficiently.

    11.1 What is AI content generator?

    • Definition:A text generator that automatically creates content for social media posts based on prompts.
    • Main benefits:
      • Time savings:Generate texts in seconds.
      • Creativity:AI provides fresh and original ideas.
      • Flexibility:Customize language, tonality, and text length to your audience and platform.

    11.2 How does AI content generator work?

    A. Creating content

    • Enter promptly:
      • Write a short instruction, e.g. B.:
        • Make a motivating contribution about the benefits of
          Teamwork.
        • Write a humorous text about the challenges of home office.

    • Set parameters:
      • Select the language
      • Select the tonality:
        • Polite:For formal contributions.
        • Funny:For informal and friendly content.
        • Enthusiastic:For motivating posts.
        • Friendly: For fun content.
        • Informatively:For factual contributions, clear and structured
        • Funny:For humorous content that attracts attention
      • Add hashtags
      • Select the number of characters
      • Creativity:
        • Economically
        • Normal
        • Good
        • Premium
      • The number of desired results

    • Generate text:
      • Click Generate, and AI will create full text according to your settings in seconds.

    • Use our prompt templates:
      • Recommended:General Prompts for social media texts
      • Facebook:Prompts specially optimized for Facebook
      • Instagram:Prompts optimized specifically for Instagram
      • X (formerly Twitter):Prompts specially optimized for X
      • LinkedIn:Prompts specially optimized for LinkedIn
      • Pinterest:Prompts specially optimized for Pinterest
      • Google companies:Prompts specially optimized for Google My Business
      • TikTok:Prompts optimized specifically for TikTok
      • YouTube:Prompts optimized specifically for YouTube

    B. Edit texts

    • Live-editing:Change the generated text directly in the editor.
    • Duplication:Create variants of the text for different platforms.
    • Cache:Save generated content in Text Manager for reuse later.

    C. Integrate texts

    • Paste the generated text directly into your social media posts.
    • Combine the text with media from File Manager.

    11.3 Advanced functions

    • Hashtag generation:
      • Automatically create relevant hashtags based on text content.
    • Platform optimization:
      • Customize the content to specific requirements of the platforms

    11.4 Common use cases

    • Developing content ideas:
      • Have AI generate suggestions for new topics or series posts.
    • Save time:
      • Create engaging posts for multiple platforms in minutes.
    • Support campaigns:
      • Use AI to create texts for a product campaign or event.
    • Local adjustments:
      • Customize content to different regions or audience, e.g. B. with localized prompts.

    11.5 Benefits of AI content generator

    • Efficiency:Generate texts faster than ever before without sacrificing quality.
    • Creativity:AI offers fresh ideas if you don’t have inspiration yourself.
    • Consistency:Create posts that fit your brand style.
    • Flexibility:Optimize texts for different platforms and audiences.

    11.6 Tips for optimal use

    • Use precise prompts:
      • The more accurate your instructions, the more appropriate the results.
    • Test several variants:
      • Generate multiple versions of text and select the best one.
    • Platform requirements:
      • Customize the length and style of the text to the target platform.
    • Combine:
      • Complement the generated texts with your own ideas or visual
        content.

    11.7 Frequently Asked Questions

    • Can I customize the texts?
      • Yes, you can edit the generated texts directly in the editor.
    • How many texts can I generate?
      • There is no limit, you can generate as many texts as you
        Needed.
    • Which languages does AI content generator support?
      • The generator supports several languages, including German, English, Spanish and French.
    • Can I save the text?
      • Yes, you can save generated content in Text Manager and reuse it later. You can also generate and save the texts directly in Text Manager with the AI Content Generator.

    11.8 Practical examples

    • A content creator:Use AI content generator to
      Create captions for Instagram.
    • Marketing team:Develops texts for a new product campaign with a
      uniform style.
    • An agency:Generates several text variants that are then coordinated with customers.

    11.9 Benefits for companies

    • Agencies:Offer customers faster content ideas and reduce
      cost creation.
    • E-commerce:Create product descriptions and promotional texts in no time.
    • Content Creator:Stay creative and productive even when you run out of ideas.

    11.10 Visual guidance for AI content generator

    • Creating text
      • Step 1:Open AI content generator in menu.
      • Step 2:Enter a prompt, e.g. B. Create a post about the benefits of
        Social media marketing or select one of our prompt templates.
      • Step 3:Select tonality and text length.
      • Step 4:Click on Create to create the text.
    • Edit text
      • Edit the text directly in the editor.
      • Add e.g. B. Add hashtags or call-to-action.
      • Save the text or add it directly to a post.
    • Save text
      • Click Save to store the text in Text Manager.
      • Organize saved texts by topic or campaign.

    The AI content generator in social poster is an indispensable tool for anyone who
    Create social media content faster, more creatively and purposefully. With his
    Flexible functions and easy operation make content creation more efficient
    than ever before.